A character reference sheet is the backbone of any consistent character design. Whether you are an illustrator, comic artist, game developer, or roleplayer, this document keeps every detail of your character stable across different poses, outfits, and scenes. In this guide, you will learn what a character reference sheet includes, how to build one efficiently, and how AI tools like Pixpop can help you generate polished reference sheets in a fraction of the time.
What Is a Character Reference Sheet?
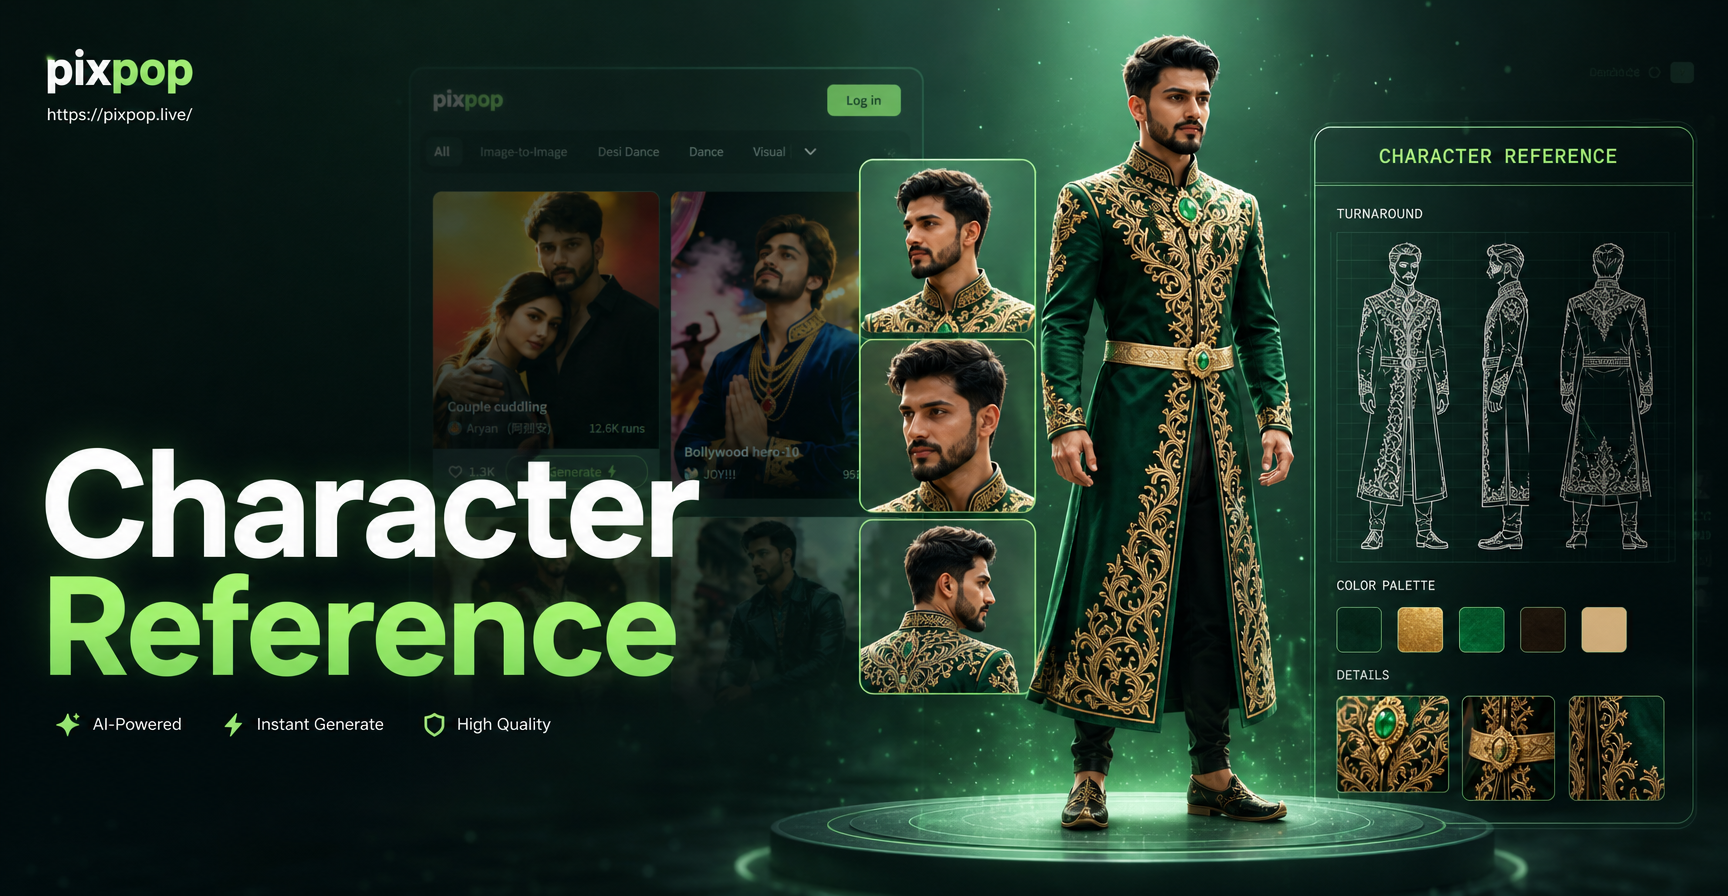
A character reference sheet, often called a model sheet or character sheet, is a visual guide that presents a character in multiple views and states. It typically includes a full body turnaround showing front, back, and side views, close up facial expressions, color swatches, and notes on unique details. The goal is to give any artist or collaborator enough information to draw or model the character accurately without guessing. For personal projects, it also helps you stay consistent when you return to a character after weeks or months.
Why Every Character Designer Needs One
Without a reference sheet, characters tend to drift. Eye color changes, hair length shrinks, outfits lose buttons. A reference sheet prevents this by locking the essential features in one place. It also speeds up teamwork: when multiple artists work on the same project, the reference sheet becomes the single source of truth. Writers and roleplayers use it to keep mental images aligned, while game designers use it to brief 3D modelers and animators.
The Key Elements of a Strong Character Reference Sheet
Not every sheet needs every element, but a complete one will include most of the following.
Full Body Turnaround
Show the character from at least three angles: front, back, and side. A three quarter view is also useful because it communicates volume and how clothing wraps the body. Keep the character in the same neutral pose across all views so proportions can be compared directly. Include a height chart or scale reference if the character exists in a world with other characters.
Facial Expressions and Close Ups
A good sheet includes a row of facial expressions: neutral, happy, angry, sad, surprised, and a signature expression unique to the character. Zoom in on the face to show eye shape, eyebrow movement, and mouth lines. This helps artists maintain emotional consistency in scenes.
Color Palette and Material Notes
List the exact colors used for skin, hair, eyes, and clothing. Use hex codes or swatches. Add short notes about materials: leather, cotton, metal, scales. This prevents color shifts and helps when reproducing the design in different lighting.
Props, Outfits, and Signature Details
If the character carries a weapon, tool, or accessory, show it separately. Include alternate outfits if they appear regularly. Note any scars, tattoos, jewelry, or distinctive marks that must remain visible.
How to Create a Character Reference Sheet with AI
Creating a reference sheet manually can take days. AI image generation speeds up the process dramatically. Pixpop, a mobile AI design app, offers text to image and image to image generation with a large library of style templates. You can use it to generate base turnarounds, explore expressions, and lock down a consistent look before finalizing your sheet.
Step 1: Write a Detailed Character Description
Start with a text prompt that describes your character completely. Include age, build, skin tone, hair style and color, eye shape and color, clothing, and any defining features. The more specific you are, the better the output. For example: A 24 year old female elf ranger with silver hair in a braid, green eyes, fair skin, wearing a dark green hooded cloak and leather armor, carrying a curved bow.
Step 2: Generate Base Turnarounds
Open Pixpop and choose a realistic or anime style template that fits your project. Enter your character description and generate several full body views. You may need to specify the view in the prompt: front view, back view, side view. Generate each angle separately to get cleaner results.
Step 3: Refine with Image to Image
Use the image to image feature to upload a result you like and ask for small changes: add freckles, change the pose, adjust the lighting, or create a matching back view. Image to image helps keep the character's core features stable while you refine individual parts.
Step 4: Compile Your Sheet
Once you have all the views and expressions you need, bring them into a layout app or a canvas and arrange them with labels. Add the color palette and notes. Your character reference sheet is ready to share or use.
Character Reference Sheet Prompts You Can Try
Here are several detailed prompts you can use directly in Pixpop or adapt to your own character. Each prompt is written to produce a clear full body reference view.
- A 28 year old male cyberpunk hacker with short black hair, cybernetic eye implant, olive skin, wearing a high collar jacket with neon blue trim, full body front view on plain gray background, character reference sheet style.
- A teenage female witch with curly auburn hair, round glasses, freckles, wearing a purple velvet dress and a pointed hat, holding a wand, full body three quarter view, soft anime style, character reference sheet.
- A grizzled 45 year old male knight with a scar across his left eye, short gray beard, steel armor with a red tabard, holding a longsword, front and back view side by side, fantasy character sheet.
- A friendly cartoon dog character with floppy ears, brown and white fur, blue collar, standing on two legs, full body turnaround with front, side, and back views, children's book style.
- A mysterious female assassin with black hair in a high ponytail, dark red eyes, pale skin, black leather outfit with silver buckles, full body side profile, dramatic lighting, character reference sheet.
- A cheerful young male barista with messy brown hair, green apron over a white shirt, holding a coffee cup, full body front view with neutral expression, modern slice of life style, reference sheet.
Tips for Consistent AI Character Generation
AI can sometimes drift between generations. These practices will help you keep your character stable.
Use the Same Style Template Every Time
Switching between realistic, anime, and 3D styles mid project will change the character's look. Pick one style template and stick with it for every generation.
Keep Your Description Consistent
Write a master prompt and reuse the same core description in every new prompt. Only change the view, expression, or outfit. Small wording changes can lead to bigger visual differences than expected.
Work in Batches
Generate multiple versions of each view and select the best one. Use image to image to bridge the gap between the version you like and the one that is almost right.
Review Small Details
Zoom in on hands, eyes, and accessories. AI often struggles with these. If a detail is wrong, do not accept it. Refine with image to image or edit manually.
Common Mistakes to Avoid
- Vague prompts: A character with brown hair and a jacket will not stay consistent because too much is unspecified.
- Forgetting the back view: Many artists only draw the front, then struggle when the character turns around.
- Ignoring lighting consistency: Use the same light direction across all views to avoid mismatched shadows.
- Changing style mid project: Stick to one style from the start.
Final Thoughts
A well made character reference sheet saves you time and frustration in every later stage of your project. With AI tools like Pixpop, you can move from a written description to a complete visual sheet in an evening instead of a week. Download the app, experiment with the prompts above, and build a reference library that will keep your characters looking their best.